Getting started: sign-in and plans
ChemGraphic 2 stores files in the cloud, so you sign in first. The first time, you go through "Sign in" → "Create Account" → "Select a Plan". Every feature is free for the first month.
- Sign in with Apple / Sign in with GoogleOne-tap sign-in. Google works on every platform, but Apple is available only on iPhone, iPad and Mac, not on Windows or Android.
- Email address and passwordYou can also register with an email address from "Don't have an account? Register". A verification email is sent after registration; open the link in it to complete verification.
* If you combine devices with different operating systems, such as a Windows PC and an iPhone, we recommend signing in with a Google account or an email address. An account created with Sign in with Apple cannot be accessed from Windows or Android.
* Please sign in with your own account rather than a shared lab account.
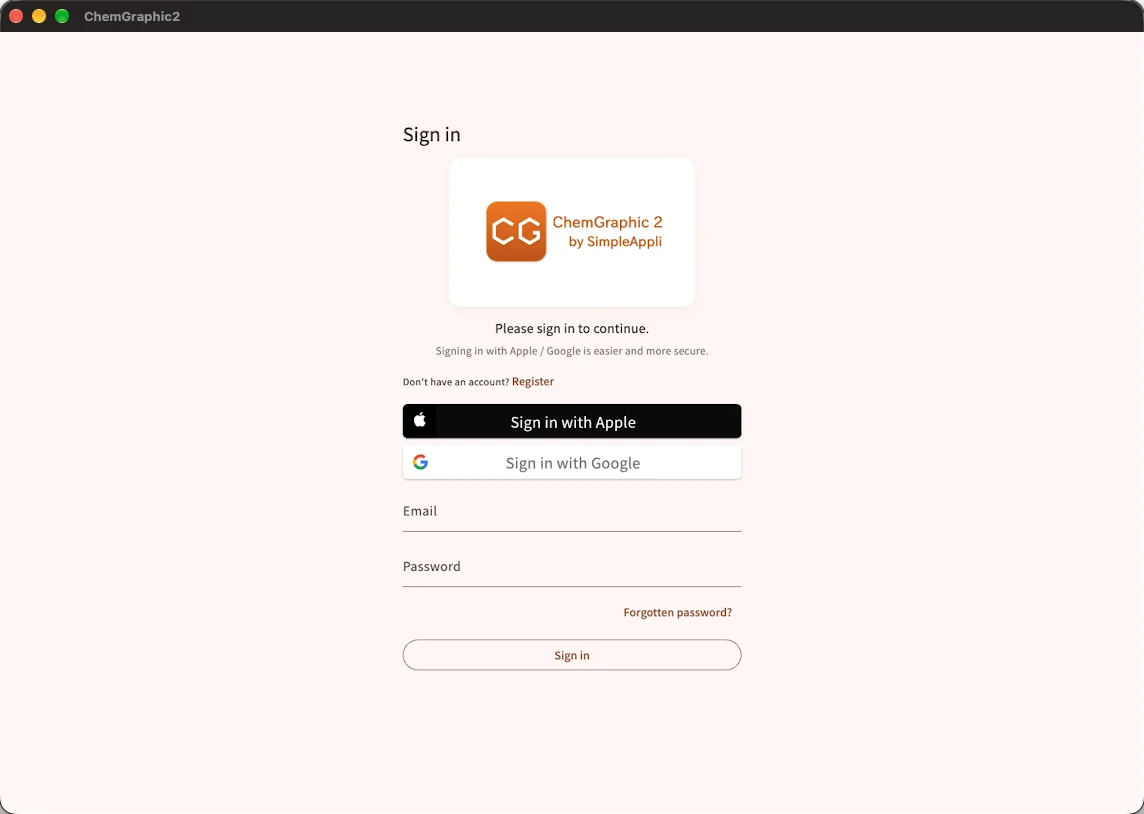
* Mac version. The "Sign in with Apple" button does not appear on Windows or Android.
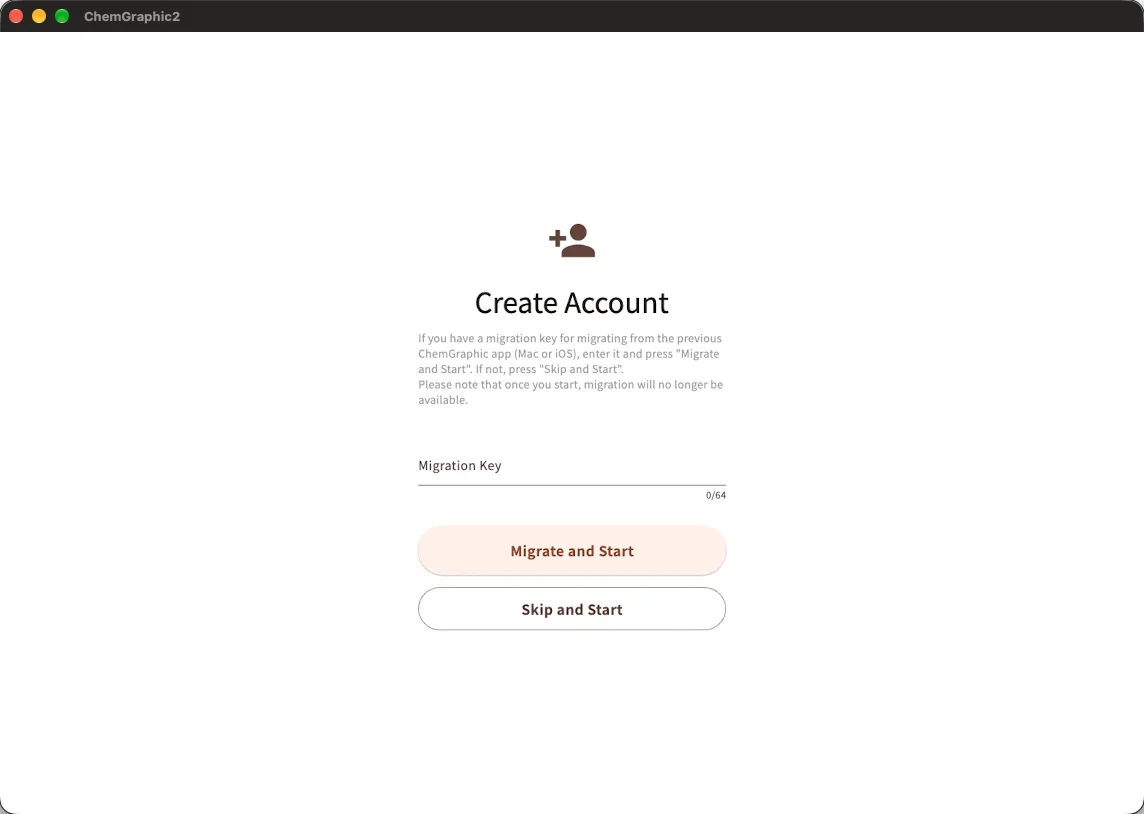
This is the only screen where a migration key can be entered. Once you start, it can no longer be applied.
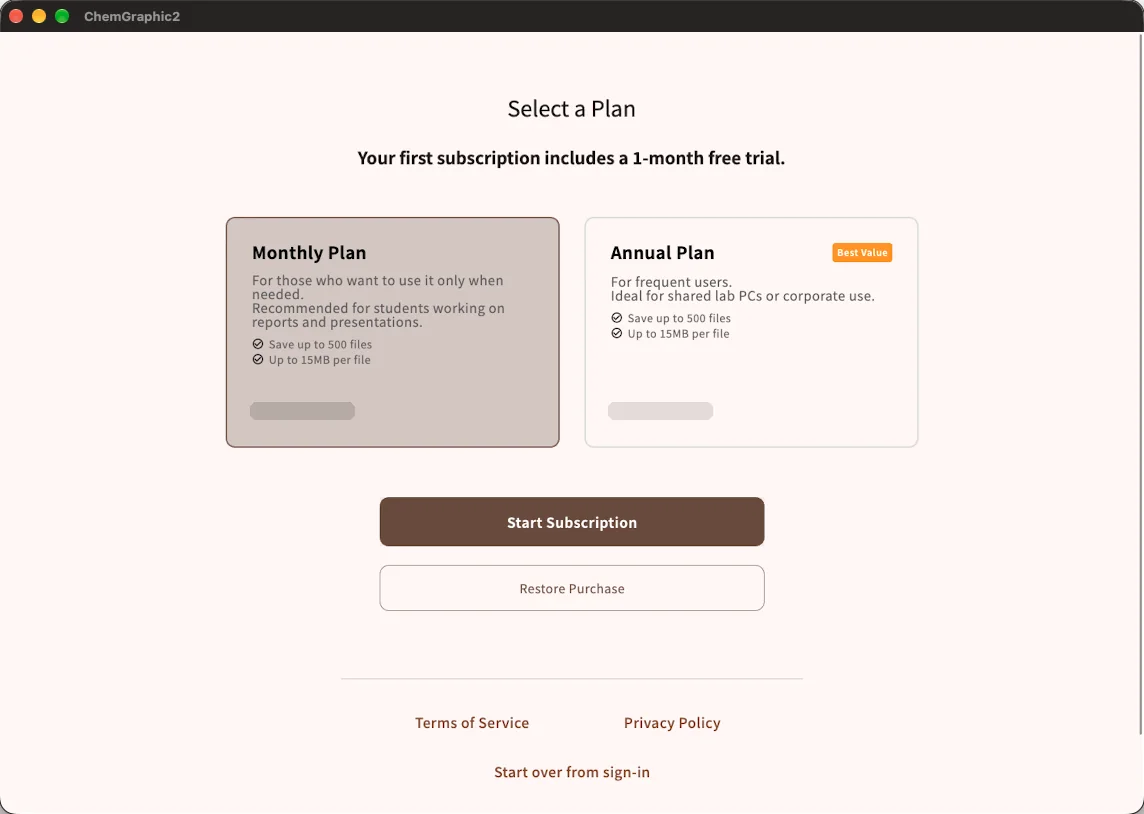
* The first month is free. The subscription renews automatically into a paid period when the trial ends. If you do not wish to continue, we recommend cancelling through the store you subscribed with at least two days before the trial ends, as the cancellation deadline differs by store and may change.
Top screen (My Files)
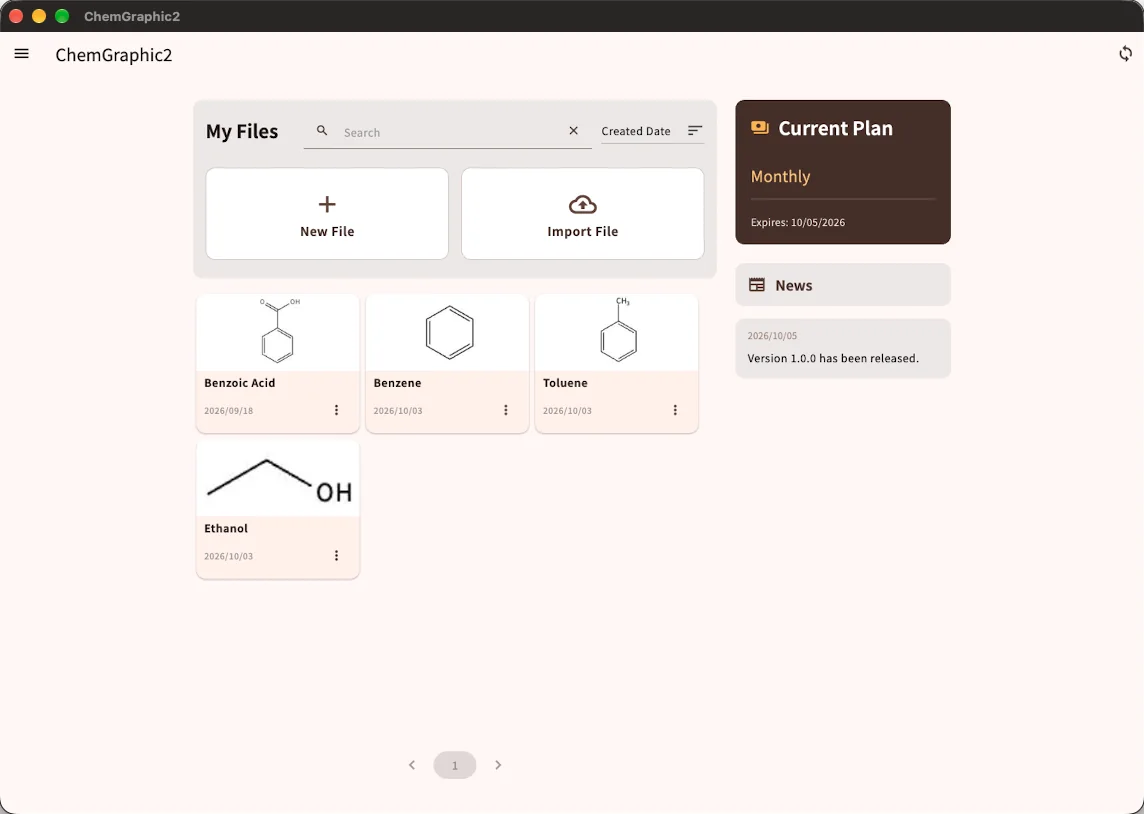
The screen that opens after sign-in. It lists the files stored in the cloud with thumbnails, and the same list opens on whichever device you sign in from.
- New FileOpens the editor with a blank canvas. You name the file in the editor.
- Import FileReads a ChemGraphic 2 file (.cg2d), a MOL / SDF file (.mol / .sdf), a legacy ChemGraphic file (.cgs / .cgt) or a SMILES / InChI string and saves it to the cloud as a new file. Legacy ChemGraphic files are not fully compatible (see 7. Export and importing other formats).
- Search and sortSearch by partial file name. Sort by created date, updated date or name.
- File cardsTap (click) to open the file in the editor. The menu in the lower right lets you rename, duplicate or delete it.
- Current PlanShows your plan and its expiry date (PC and tablet layouts only; on phones, open "Account" from the menu).
- NewsUpdate announcements and other notices.
- Sync button (top right)Saves from other devices are picked up automatically, but you can force an immediate refresh with this button.
- Menu (top left)Four items: Account, Contact, Language (Japanese / English) and About this app.
Parts of the editor screen
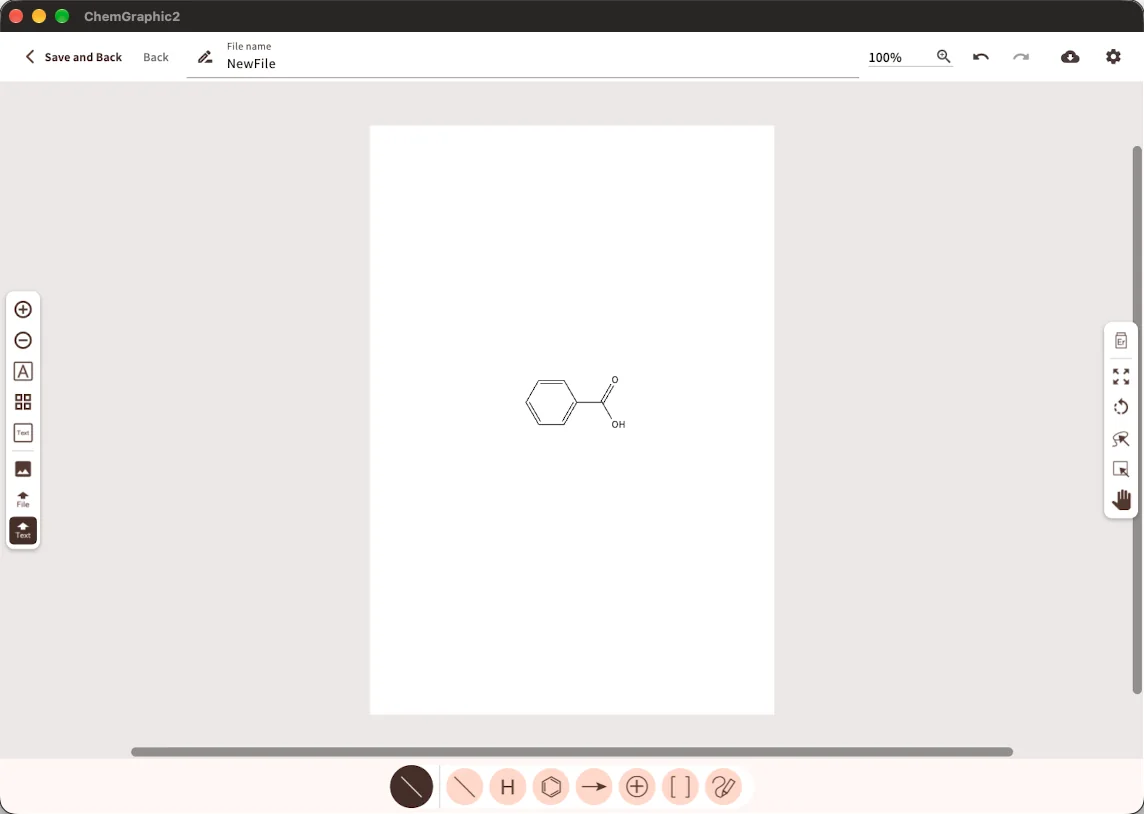
Where you draw structures. Tools are grouped into creation tools (bottom), manipulation tools (right) and standalone tools (left). The layout is the same on PC, tablet and phone. Hover over a button to see its name.
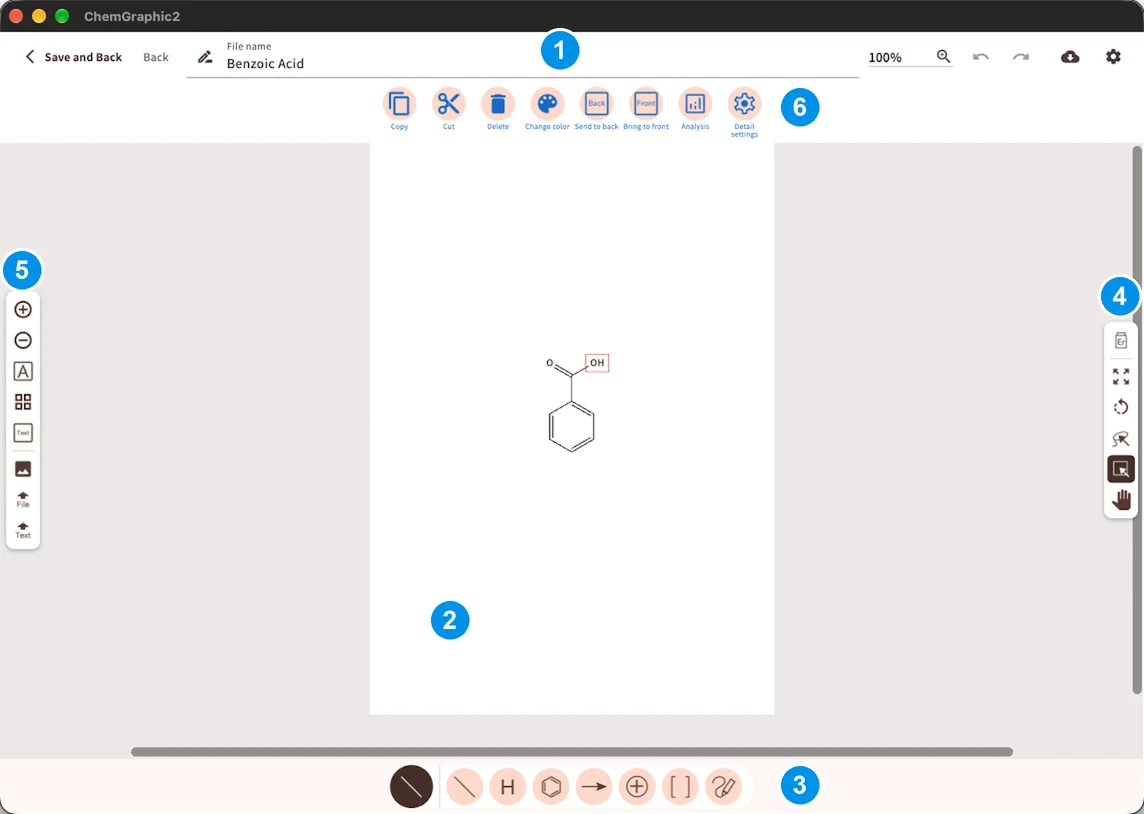
- App bar (top)From left: "Save and Back", "Back" (leave without saving), file name, zoom level, undo / redo, "Download" (cloud icon) and settings (drawing style). Saving writes directly to the cloud. On phones there is no "Back" due to limited width; the "Save" button in the top left always saves before going back.
- CanvasDraw on the white page. The grey area around it is scroll margin. The page size can be changed in the drawing style.
- Bottom toolbar (creation tools)The circle on the left shows the current creation tool. To its right are seven categories: bond, atom, ring, arrow, charge, bracket and other (freehand, etc.). Tap a category to expand the specific tools (bond types, ring types, arrow types, ...) above it.
- Right toolbar (manipulation tools)From top: eraser, scale, rotate, free select (lasso), rectangle select and hand. The hand tool drags every object on the canvas at once, so you can quickly slide the whole drawing if you started in the wrong place.
- Left toolbar (standalone tools)From top: label charge +, label charge −, custom atom label (A), periodic table, text, insert image, file import (MOL / SDF etc.) and "Import SMILES / InChI".
- Selection toolbarAppears at the top only while objects are selected. With an atom selected it shows Copy, Cut, Delete, Change color, Send to back, Bring to front, Analysis and Detail settings (the items depend on what is selected). In the screenshot, OH is selected.
Basic drawing
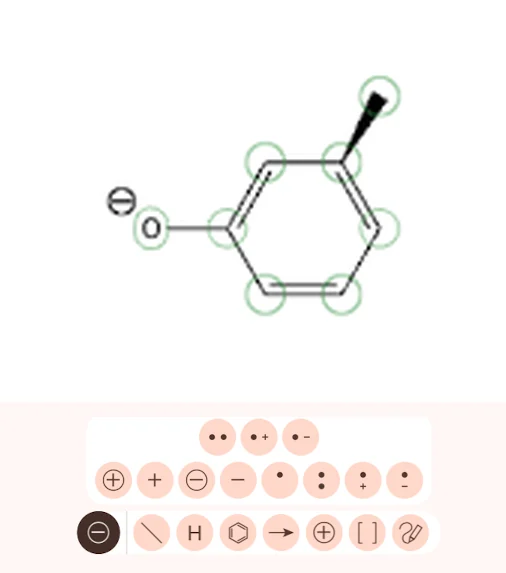
The basics of placing bonds, rings and atoms, following one drawing as a ring, a wedge bond, an atom label and a charge are added to a single bond. For fine work, raise the zoom level in the app bar.
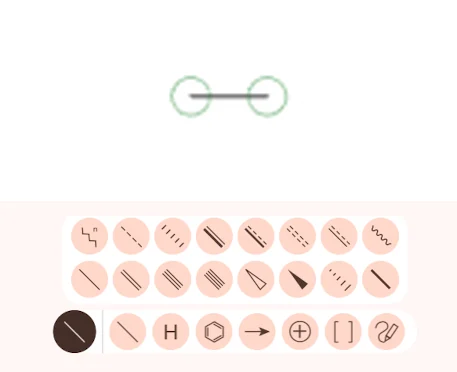
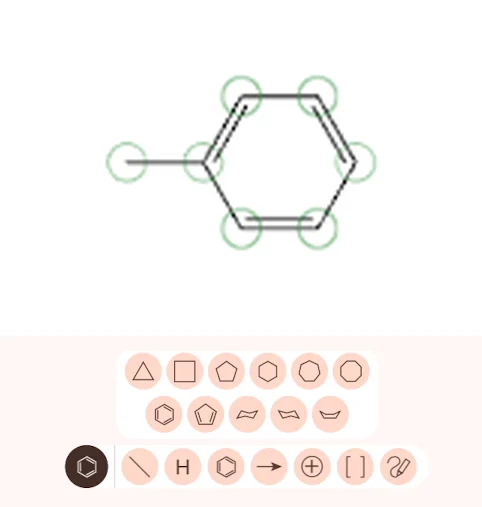
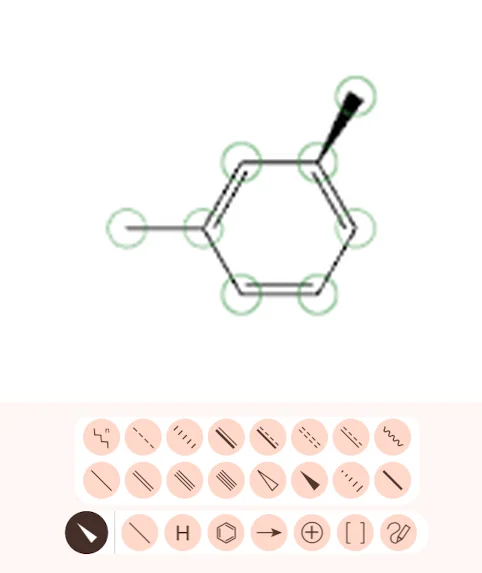
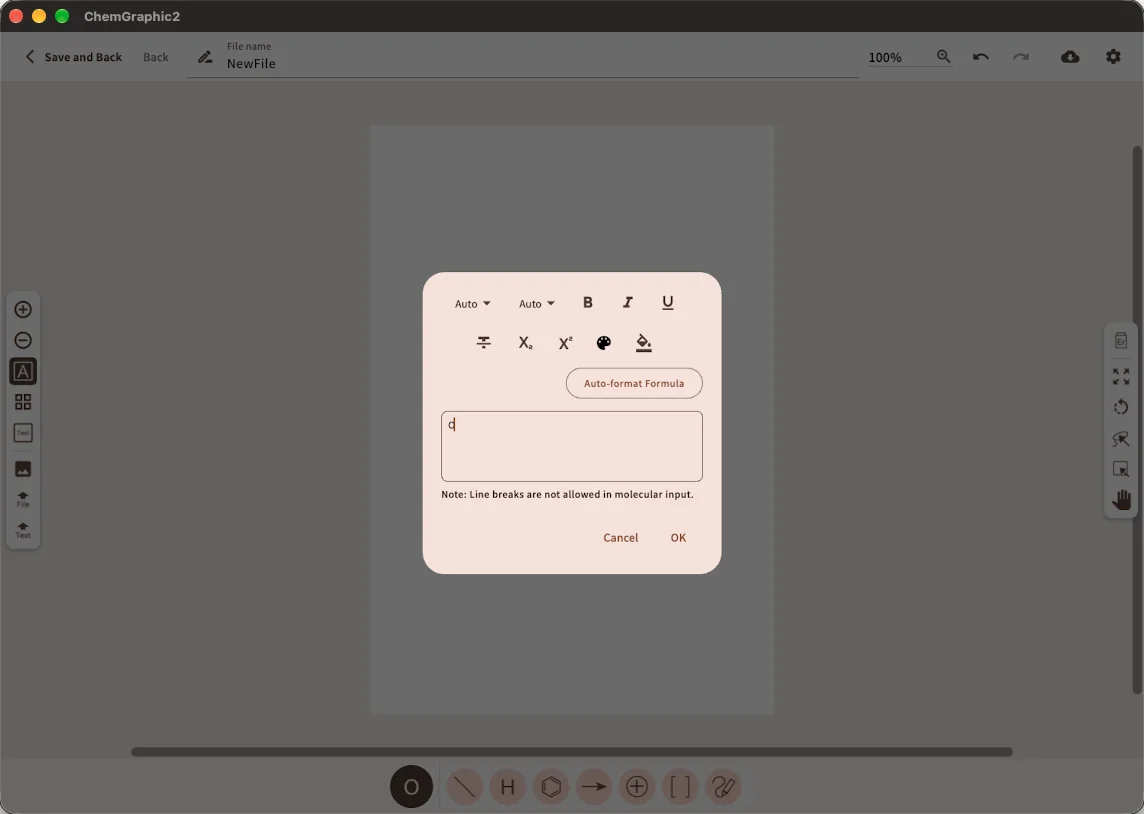
For free-standing text such as notes with line breaks, choose "text" in the left toolbar and tap the canvas.
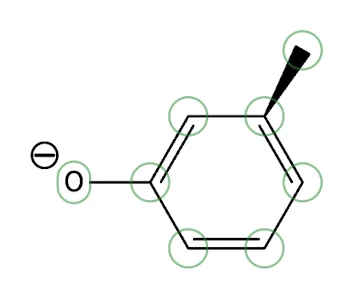
Switching the position of a double bond
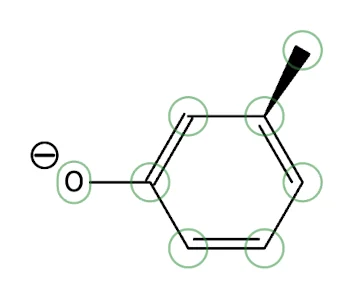
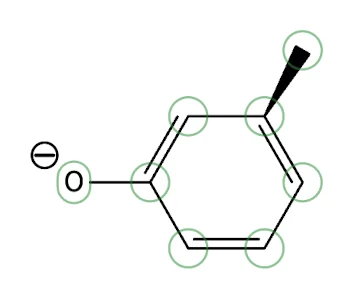
With a double bond type selected, tap an existing double bond to move its second line. Each tap moves it to the next of three positions, and the third tap brings it back to where it started. The images show the upper-left double bond (the bond running up and to the right from the carbon bearing O) as it is tapped.
Spectrum prediction (IR / NMR)
Shows predicted IR, ¹H-NMR and ¹³C-NMR spectra for a molecule on the canvas. The calculation runs in the cloud, so it works regardless of your device's performance.
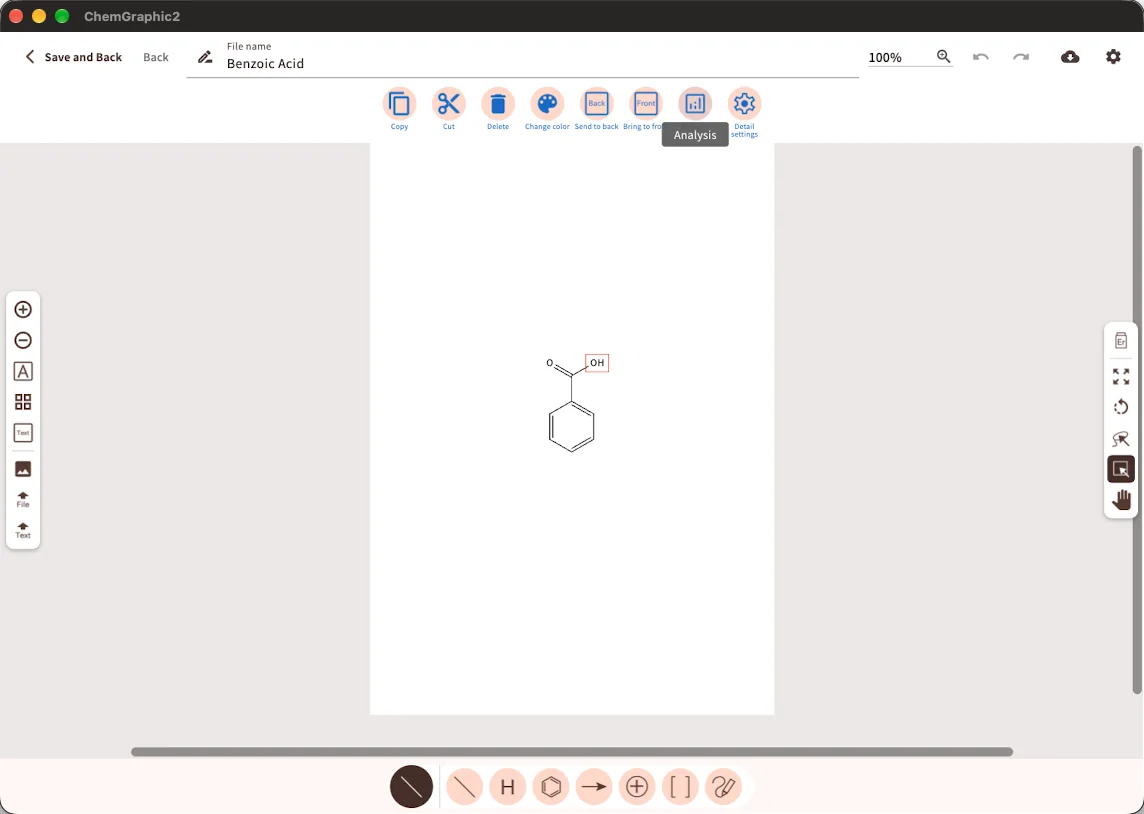
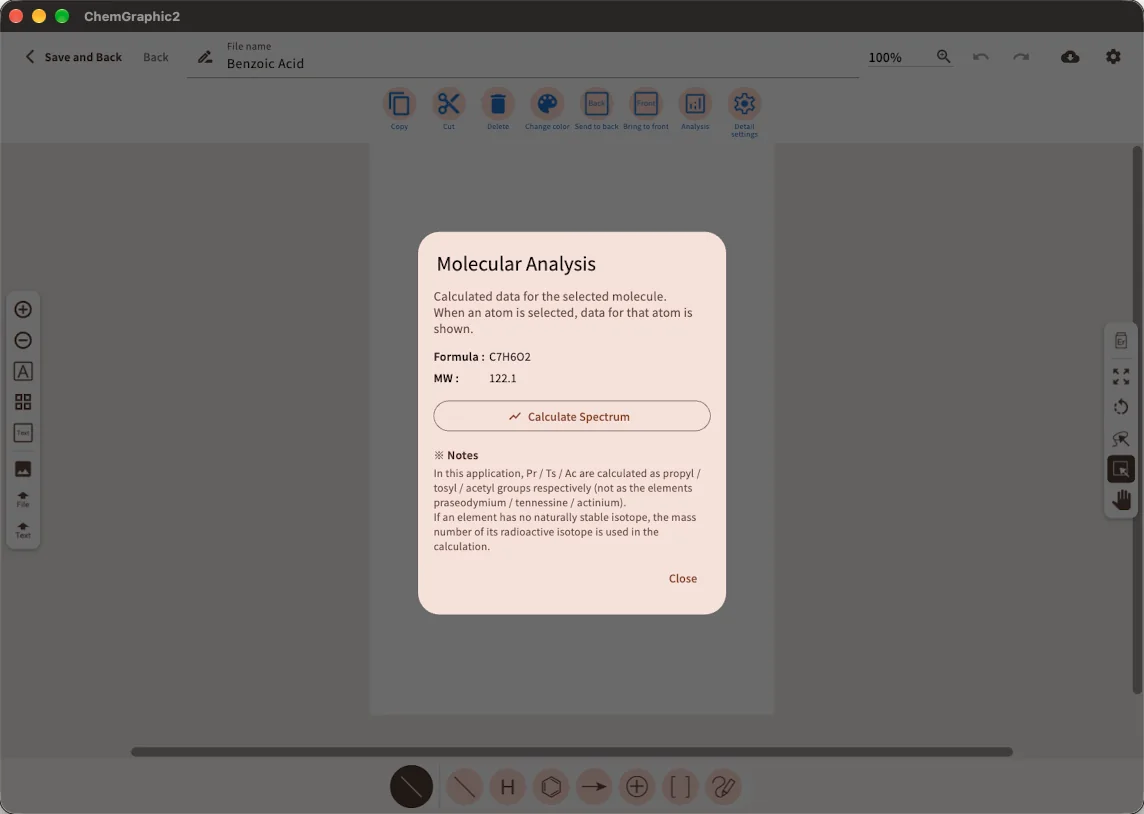
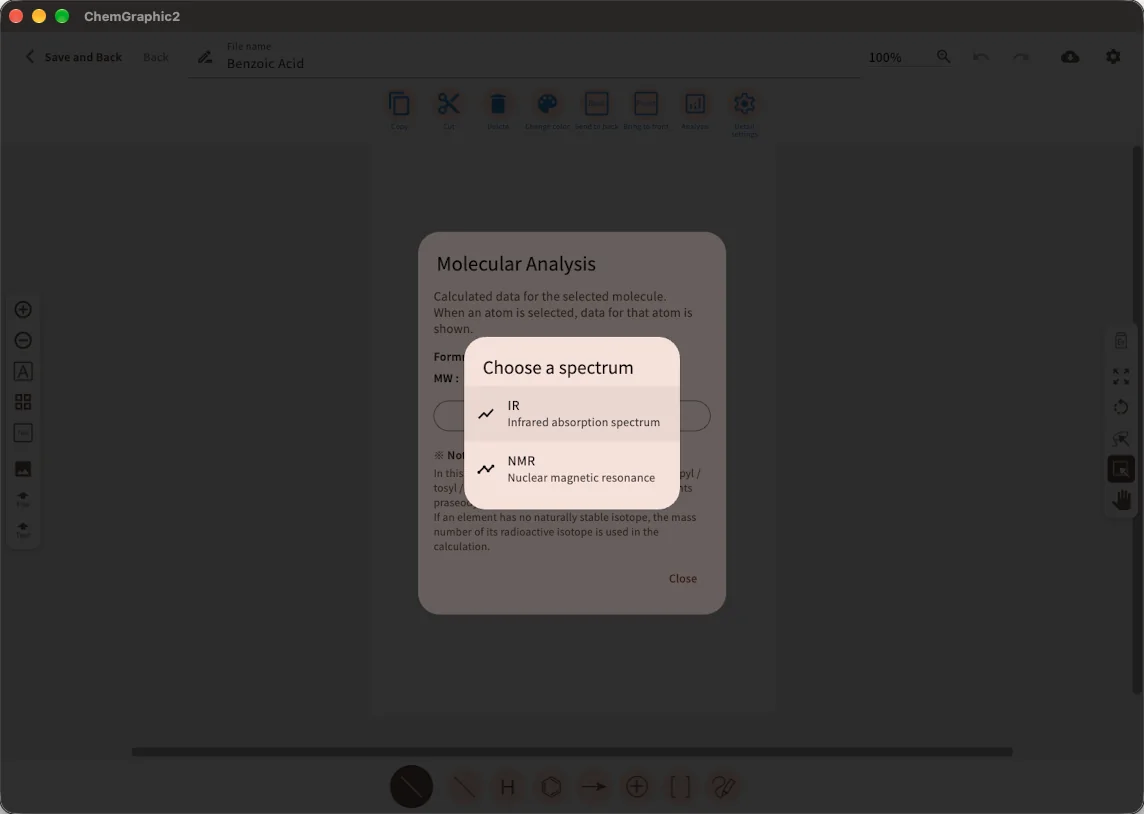
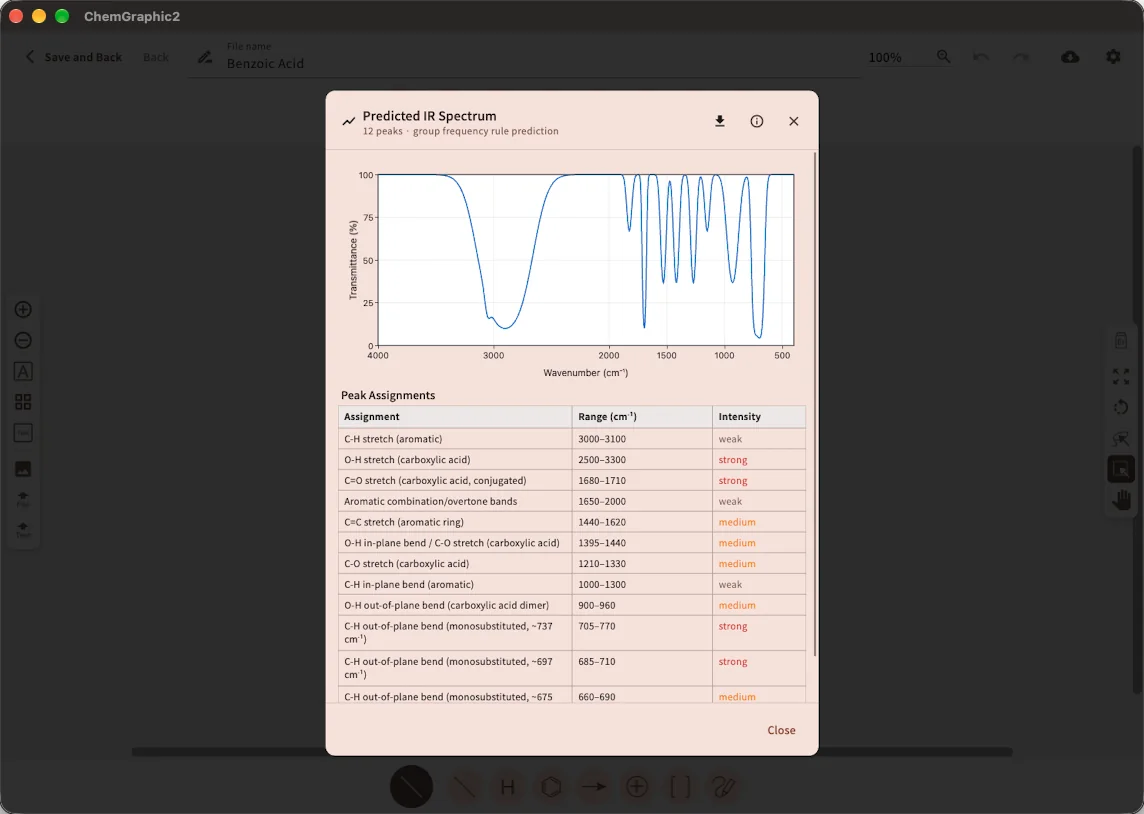
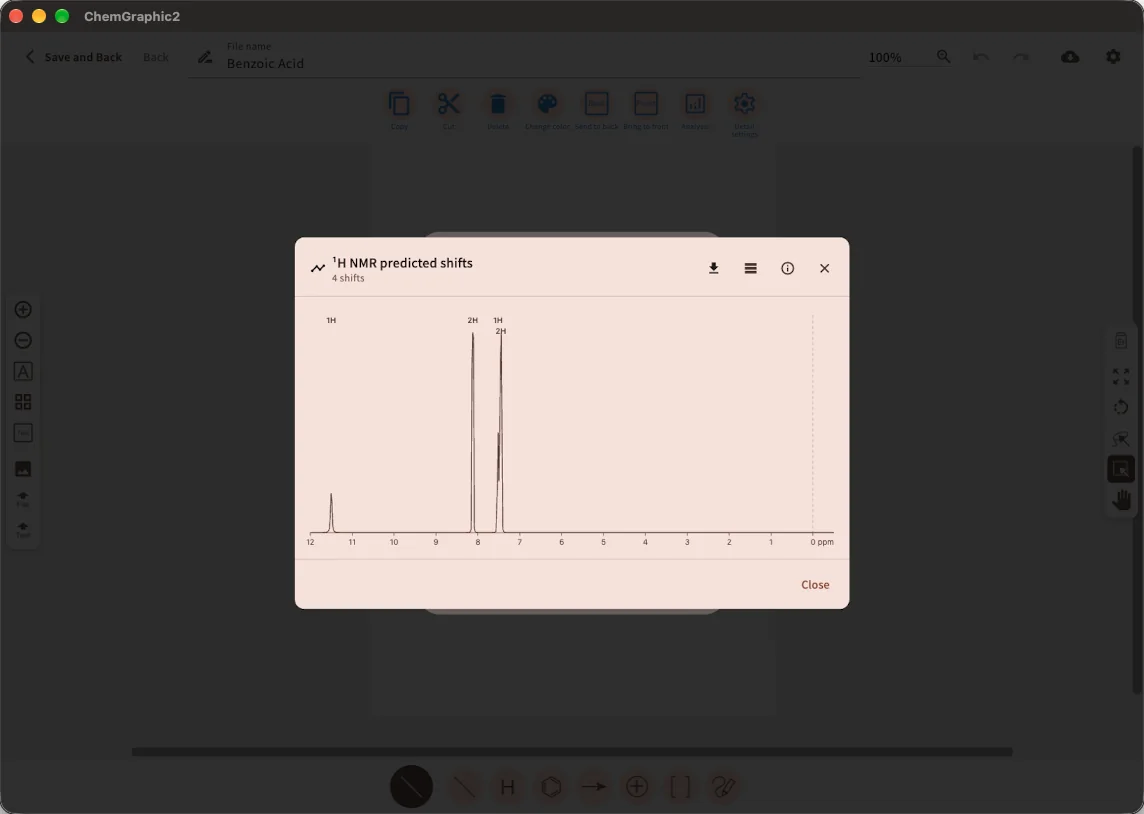
* Group-frequency IR and NMR return instantly. xtb IR calculates with a chosen solvent, takes longer, and has monthly usage and molecule-size limits.
* The atom labels Pr / Ts / Ac are calculated as propyl / tosyl / acetyl groups (not as the elements praseodymium / tennessine / actinium). If an element has no naturally stable isotope, the mass number of its radioactive isotope is used.
* All results are estimates and do not replace measured spectra.
Drawing style settings
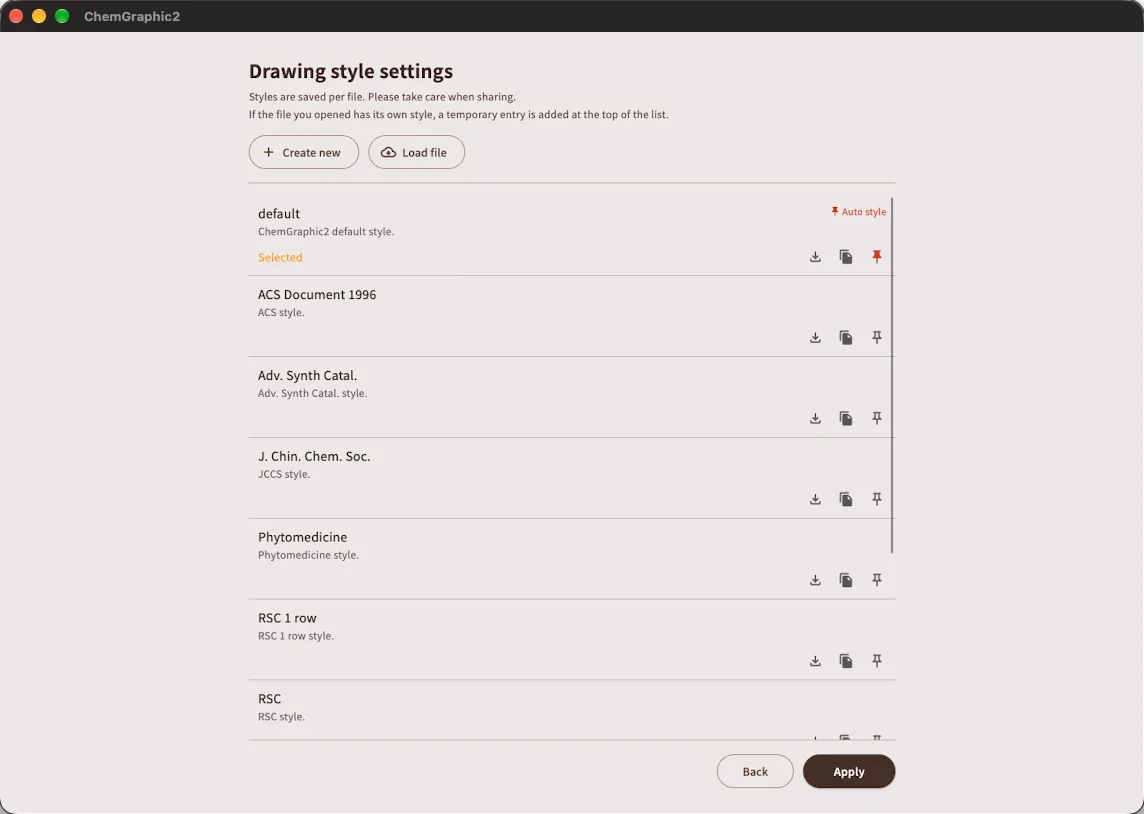
Switches the look of your structures (bond length, line width, fonts, page size and more) in one go. Open it from settings at the right end of the editor's app bar.
- Style listThe built-in journal styles (ACS Document 1996, Adv. Synth. Catal., J. Chin. Chem. Soc., Phytomedicine, RSC and more) and your own styles appear in a single list. Tap one and press "Apply" to use it for the current file.
- Auto style (pin)The pinned style is applied automatically to new files. The default style is pinned at first; move the pin to the style you use most so you do not have to select it every time.
- Create new / duplicateCreate your own style with "Create new" or the duplicate icon on a card, then fine-tune line widths, fonts and so on. Your styles are saved to your account and shared across all your devices.
- Load file / downloadStyles can be exported and imported as files, so a lab can share a common style.
* The style is stored with each file. Applying a different style converts the existing structures in that file as well.
Export and importing other formats
How to export structures as images or chemical file formats, and how to bring in structures created in other software.
Export
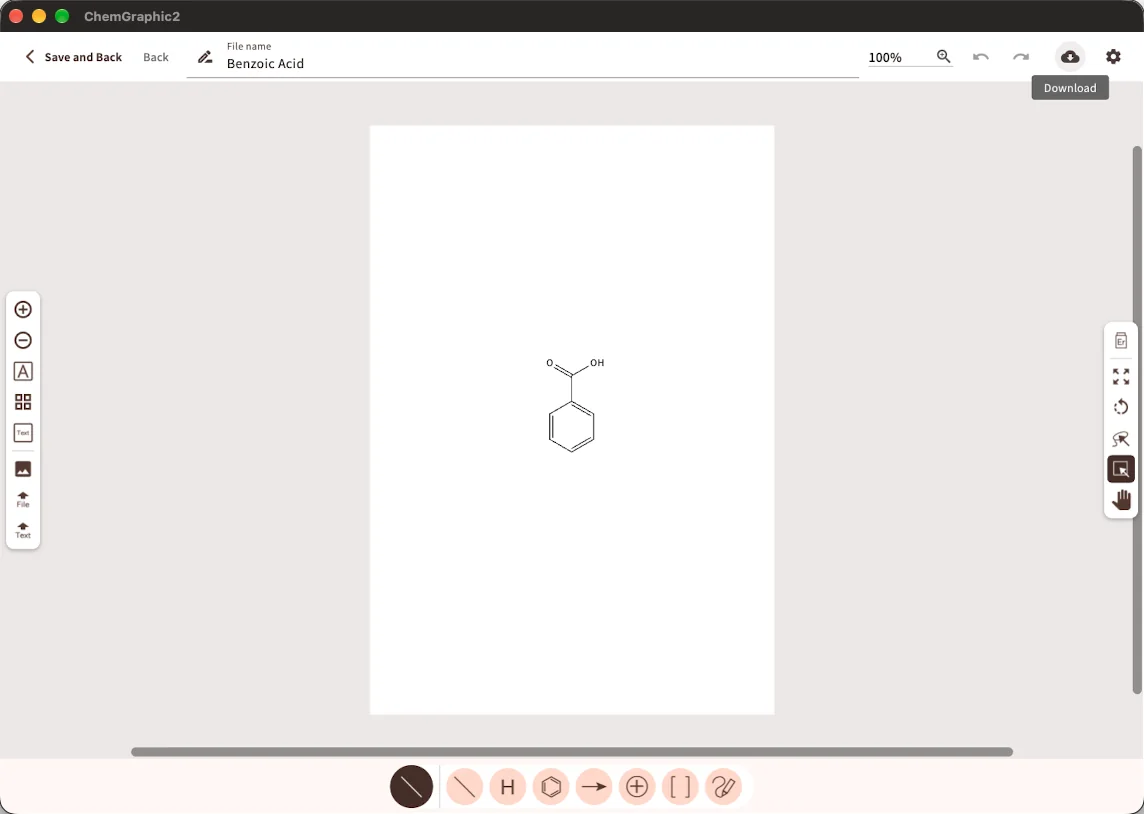
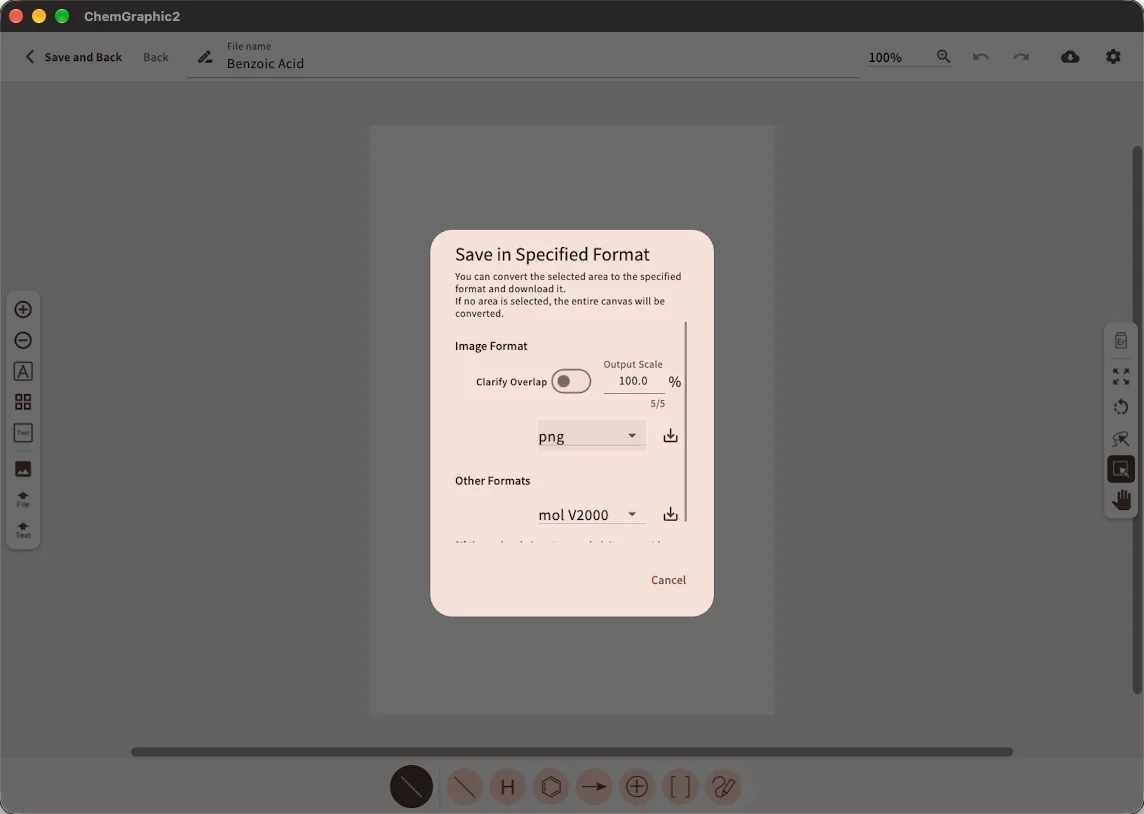
* MOL / SDF contain only atoms and bonds, so arrows, images and brackets are not included.
Import from SMILES / InChI
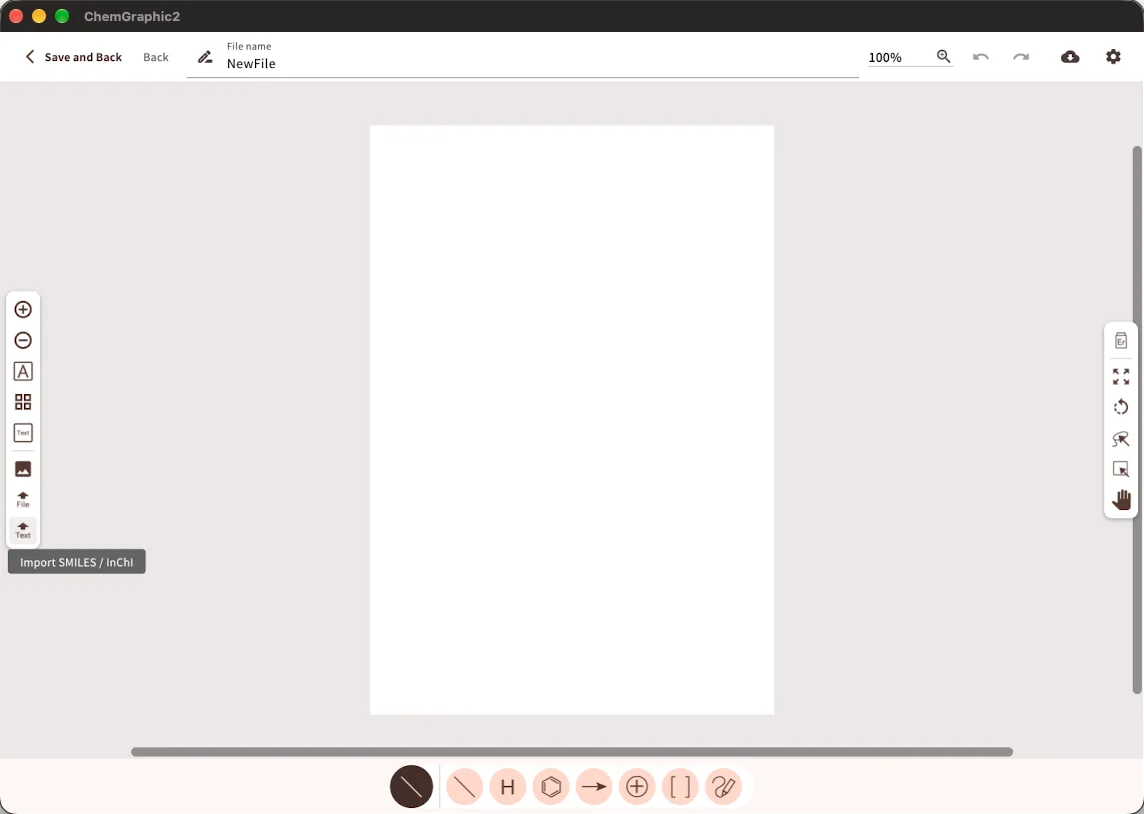
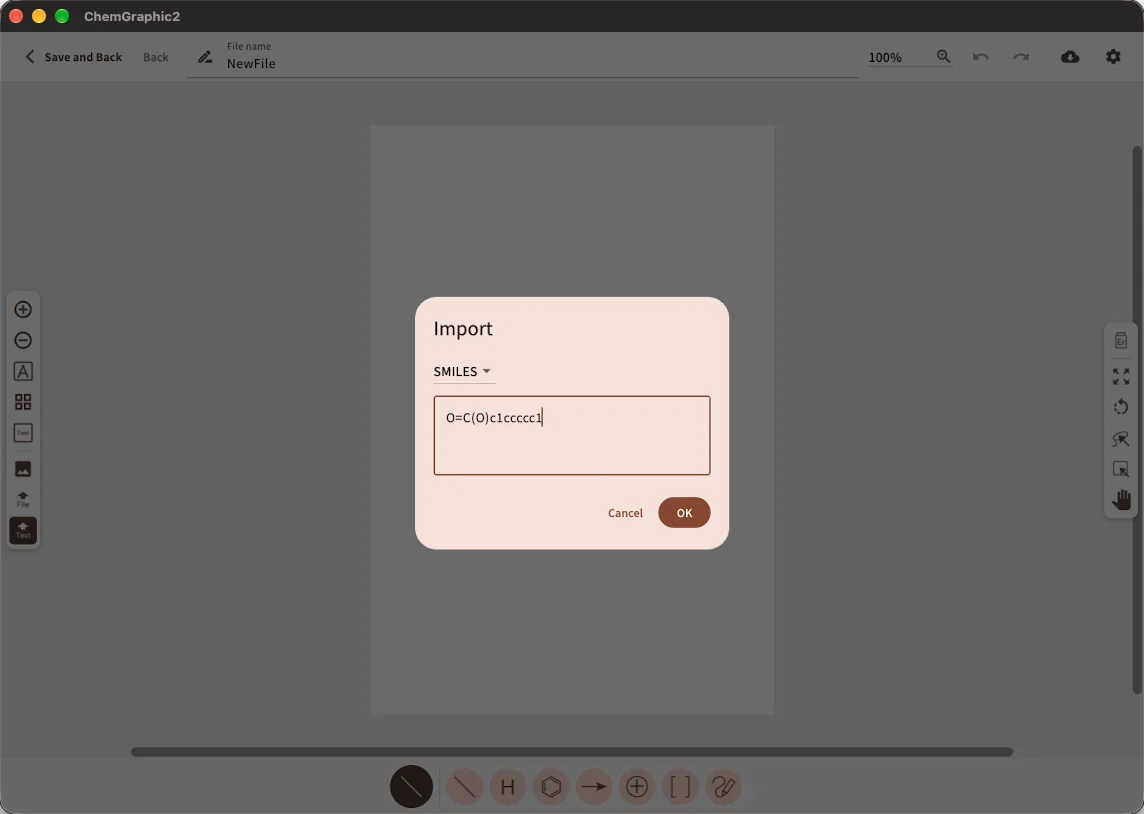
* ChemGraphic 2 files (.cg2d), MOL / SDF files (.mol / .sdf) and legacy ChemGraphic files (.cgs / .cgt) can be added to the current file with "file import" in the left toolbar (the button just above "Import SMILES / InChI"), or opened as a new file with "Import File" on the top screen.
* On Windows and Mac, you can also drag and drop a file onto the editor canvas to add it to the current file (.cg2d, .mol, .sdf, .cgs and .cgt, as well as PNG and JPEG images).
* Legacy ChemGraphic files (.cgs / .cgt) are not fully compatible. They contain settings specific to Mac / iOS (especially for text formatting), and tools such as arrows work differently in ChemGraphic 2. After opening a legacy file, adjust any text or arrows that look different from the original.
Syncing between devices
Because files are stored in the cloud, every device sees the same files with no extra steps. Knowing how it works helps when you use several devices side by side.
- Saving writes to the cloudWhat you save with "Save and Back" in the editor is written straight to the cloud. There is no device-only "local save".
- Other devices pick it up automaticallyWhen you save on one device, the file list on any other open device refreshes automatically. If it does not appear right away, press the sync button in the top right of the top screen.
- If the same file is edited on two devices at onceThe first save wins. The device that saves later is told the file was updated elsewhere and asks whether to overwrite or discard and go back. Make sure you have the latest version open before you start editing.
* Sync works between devices signed in with the same account.
* Saving and loading files requires a network connection.
Account management
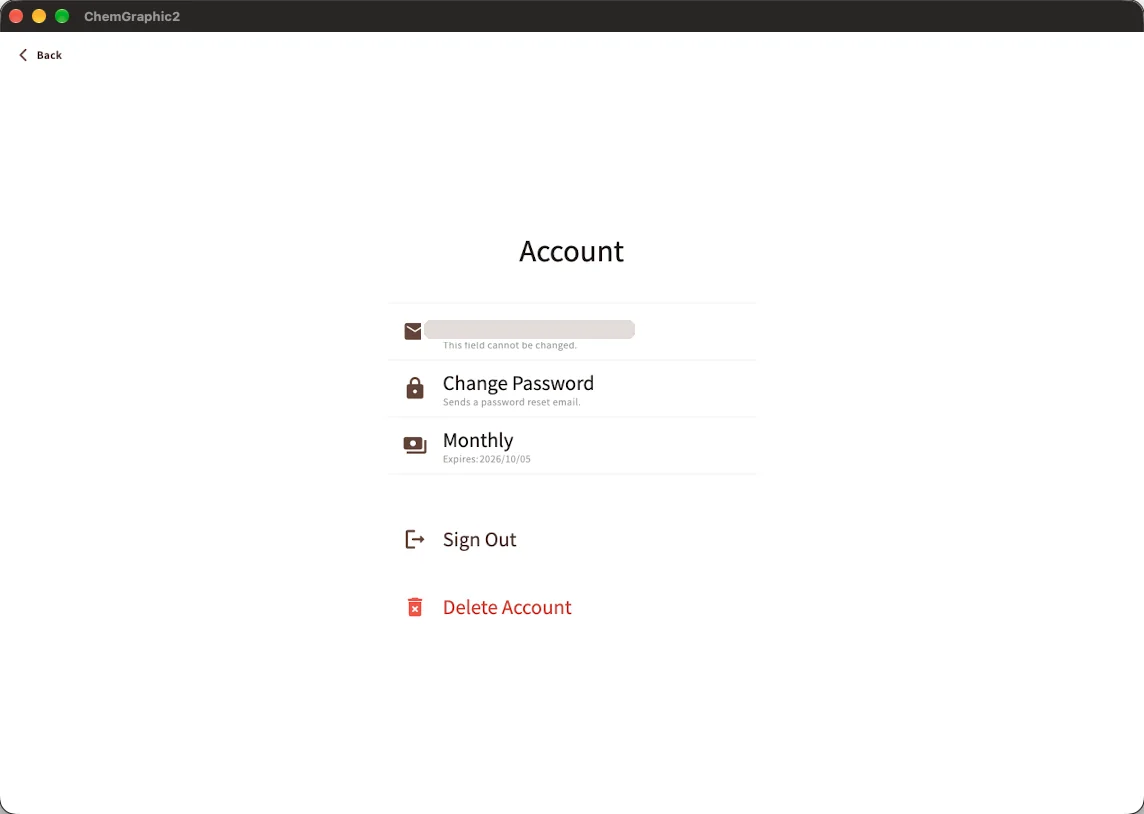
Open "Account" from the menu in the top left of the top screen to see your registered email address and subscription status, or to change your plan.
- Email addressThe email address you sign in with. This field cannot be changed.
- Change PasswordSends a password reset email (for accounts registered with an email address).
- Subscription status (plan name)Shows your plan and its expiry date. Tap the plan name to open the plan change screen, where you can switch between monthly and annual (the screen differs depending on your device's store).
- Sign OutSigns out on this device. Your files in the cloud are not deleted.
- Delete AccountDeleting the account also deletes all files and styles stored in the cloud. Export anything you need first.
* Cancel from the subscription settings of the store you subscribed through (Microsoft Store / App Store / Google Play). Cancellation is not available inside the app, and deleting your account does not cancel the subscription.
* A migration key from the previous ChemGraphic can only be entered when the account is created (see 1. Getting started).